I accidentally deleted some important files from my MacBook’s APFS drive and already emptied the Trash. I’m worried they may have been overwritten or affected by snapshots/SSD TRIM. What’s the safest way to try APFS file recovery on macOS without making things worse?
First thing: stop using the drive if you can. That matters more than which recovery app you pick. With APFS, if you deleted a folder, erased something by accident, or lost a partition, writing new data to that same disk can make the missing files harder or impossible to recover.
I went through this a few months back after deleting a whole project folder on my MacBook with no Time Machine backup. I figured it was gone, but I ended up getting almost all of it back.
Before paying for recovery software, I’d check the easy stuff:
- Look in the Trash.
- Check Time Machine if you use it.
- Open Time Machine anyway, even if your backup drive was not connected. APFS can keep local snapshots, so macOS may still have something recent sitting there. They usually stick around for about a day if there’s enough free space.
If that does not turn anything up, then I’d go to recovery software rather than trying random repair steps.
I used Disk Drill because it actually supports APFS properly and is not limited to just finding files by signatures.
What I did was pretty straightforward:
- Downloaded Disk Drill to another drive, not the one I was recovering from.
- Went to System Settings > Privacy & Security > Full Disk Access and gave Disk Drill permission. Without that, it may not be able to scan APFS system volumes properly.
- Picked the affected APFS drive.
- Ran a full Search for Lost Data scan.
- Waited for the whole scan to finish instead of stopping early.
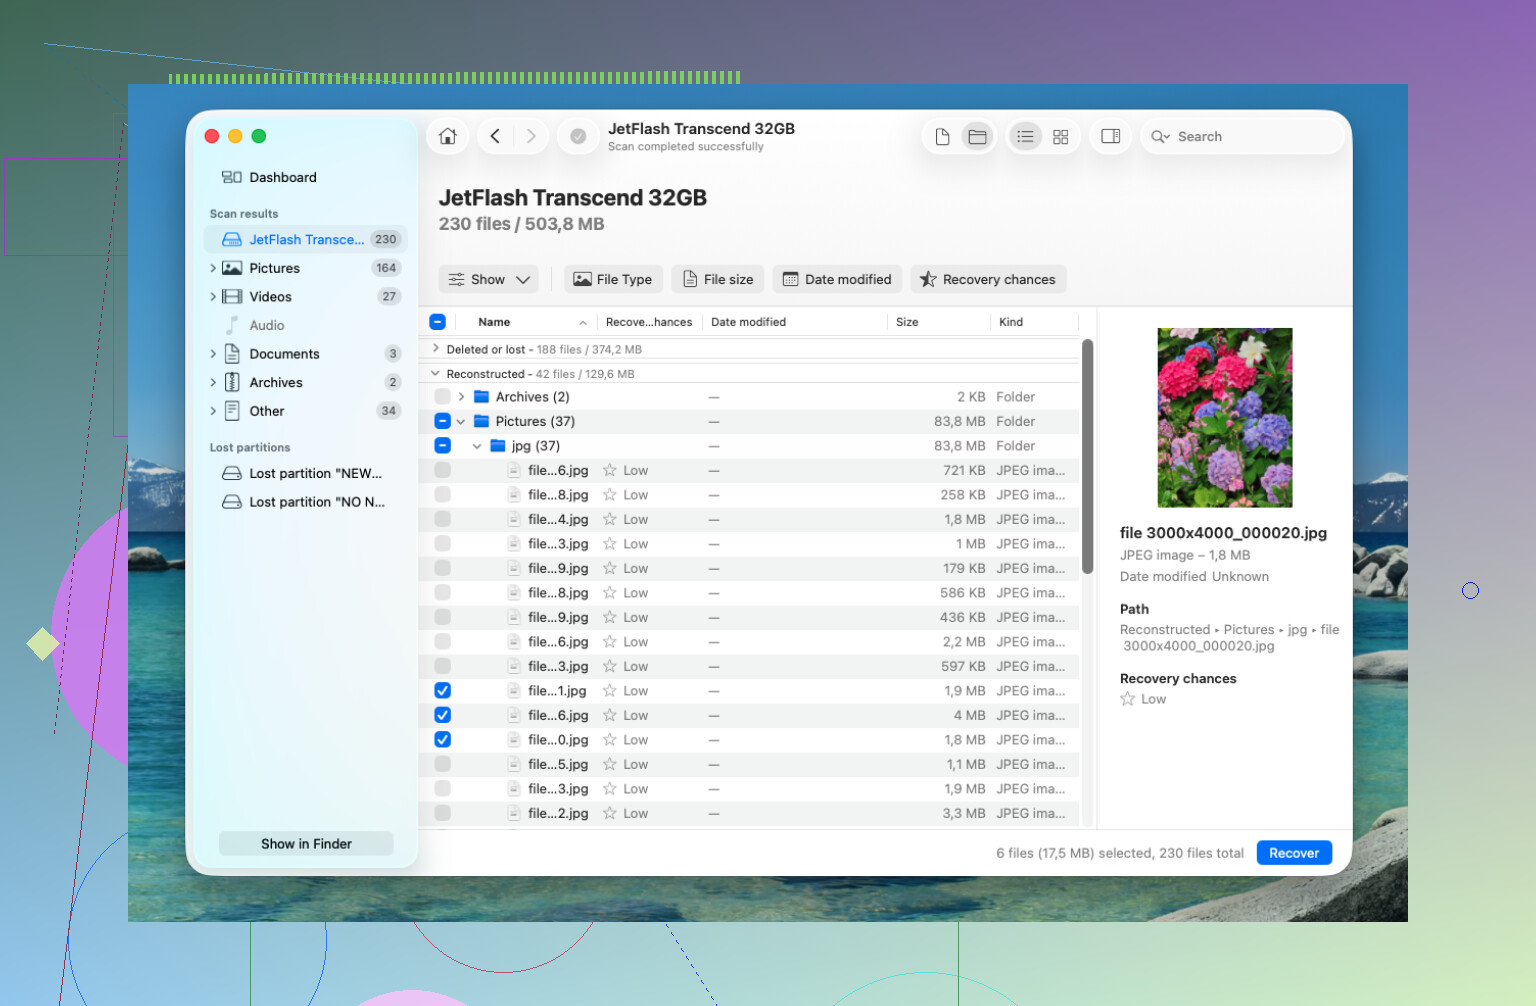
- Previewed the files before recovering them.
- Recovered the files to an external SSD, not back onto the Mac.
The useful part was that most of my folders came back with the original names and folder structure. That made a huge difference because manually sorting a pile of unnamed recovered files is miserable. Disk Drill also has a built-in SMART monitor, which is helpful if you think the drive might be failing. If the drive seems unstable, you can make a disk image first and recover from that instead of repeatedly scanning the original disk.
If this is a lost APFS partition, I would still recover the important files first before trying to fix the partition. TestDisk can sometimes repair damaged partition structures, but it is text-based and pretty easy to mess up if you do not already know your way around it. My rule is recover first, repair later.
Also, SSDs are a little more time-sensitive because of TRIM. Modern Macs clean up deleted blocks in the background, and once those blocks are wiped, recovery software cannot pull the data back. That is why shutting the Mac down or at least avoiding use of that drive matters. Traditional hard drives usually have better odds after accidental deletion because they do not work the same way.
If Disk Drill can find the files and the previews look correct, that is usually a good sign.
But if the Mac does not recognize the drive, it keeps disconnecting, you hear clicking, or the APFS container looks seriously corrupted, I would stop poking at it and talk to a professional recovery lab. A lot of reputable ones will evaluate it for free and many work on a no data, no fee basis. It costs more than software, but if the issue is physical, DIY attempts can make things worse.
Hopefully it is just an accidental deletion or a damaged partition. Those are usually the cases where software recovery has the best shot, especially if you catch it quickly.
If this is the built-in SSD on a newer MacBook, recovery is possible but far from guaranteed once the Trash is emptied. I agree with @mikeappsreviewer on stopping writes, but I’d be stricter: don’t keep booting and browsing from that same macOS install while “thinking about it,” because Spotlight, iCloud sync, updates, browser caches, and logs can all write to the disk. Before buying anything, check iCloud Drive’s Recently Deleted, Photos Recently Deleted, app-specific trash folders, and Time Machine/local snapshots. If you try Disk Drill or any other APFS recovery tool, run it from another drive if possible and only recover to an external disk. Preview matters more than the file list, since APFS scans can show names for files that are no longer actually recoverable after TRIM.
Do not run First Aid, reinstall macOS, “repair” the APFS container, or try to clean up space before recovery. Those are exactly the kinds of well-meaning steps that can turn a recoverable deletion into a dead end, especially on an internal SSD.
The awkward part with APFS on a MacBook is that the file name showing up in a scan does not prove the file contents are still there. Metadata can survive longer than the actual blocks, and TRIM can make the recovered file come back as junk or zeroed data. So I’d treat previews as the real test. If a recovery app shows your document/photo/video and it previews correctly, recover it immediately to an external drive. If it only lists names with no preview, don’t get too excited yet.
Disk Drill is a reasonable tool to try for this, but I would not install it on the same Mac volume you are trying to recover from. Boot from another disk if you can, or at least use another Mac and an external recovery destination. And if the missing files are worth serious money or are legally/business-critical, skip the “try five apps and see” phase. Every scan is less risky than writing new files, but the safest DIY attempt is still: stop using the Mac, scan once in the least invasive way, recover elsewhere, then decide whether the result is good enough.

Boot it into macOS Recovery and leave the normal startup volume alone until you decide your recovery path. On a MacBook with an internal APFS SSD, “I’ll just use it carefully for a few minutes” can still mean background writes from macOS, iCloud, Spotlight, logs, swap, browser cache, etc.
Yes, recovery can still be possible after emptying Trash, but I would set expectations lower than with an old spinning hard drive. APFS may still have directory info, snapshots may save you, or a recovery tool may find intact file records. On the other hand, TRIM and SSD garbage collection can mean the file entry is visible but the actual contents are already gone. That is why the preview point people mentioned matters. A file name is evidence, not proof.
A practical route I’d use is:
- Shut down if you have not already.
- Boot Recovery, or boot from an external macOS disk if you already have one.
- Check snapshots before doing scans. In Terminal,
tmutil listlocalsnapshots /can show local Time Machine snapshots. - If a snapshot exists from before the deletion, restore from that first. That is usually cleaner than file carving.
- If no snapshot helps, scan the affected volume with a recovery tool and save results to a separate external drive.
Disk Drill is fine to try, but I would treat it as a scanner first, not a magic undo button. If it previews the exact files correctly, recover them immediately somewhere else. If it shows thousands of files with broken previews, do not assume paying or rescanning ten times will fix that. Sometimes the metadata survived and the data did not.
The other detail people forget is encryption and Mac model. On T2 and Apple silicon MacBooks, the internal storage is tied into the Mac’s security hardware, and the SSD is not something a shop can casually pull and read in another machine. If the Mac boots and you know the password, that is good. If it is failing, locking up, or the APFS container will not mount, stop earlier and talk to a lab before running more tools. For a normal accidental delete, though, the safest DIY order is snapshot check first, then one careful scan, then recover to external storage.